Component layout evidence
A backpack parts diagram works better when buyers can see the parts before assembly
This image adds a real parts-table reference for straps, zipper panels, lining, foam, buckles, webbing, mesh pockets, and shell fabric.
Backpack diagram
Backpack sourcing gets cleaner when buyers name the same construction parts as the factory. The diagram is built for sourcing guides, tech packs, and supplier comparison pages.
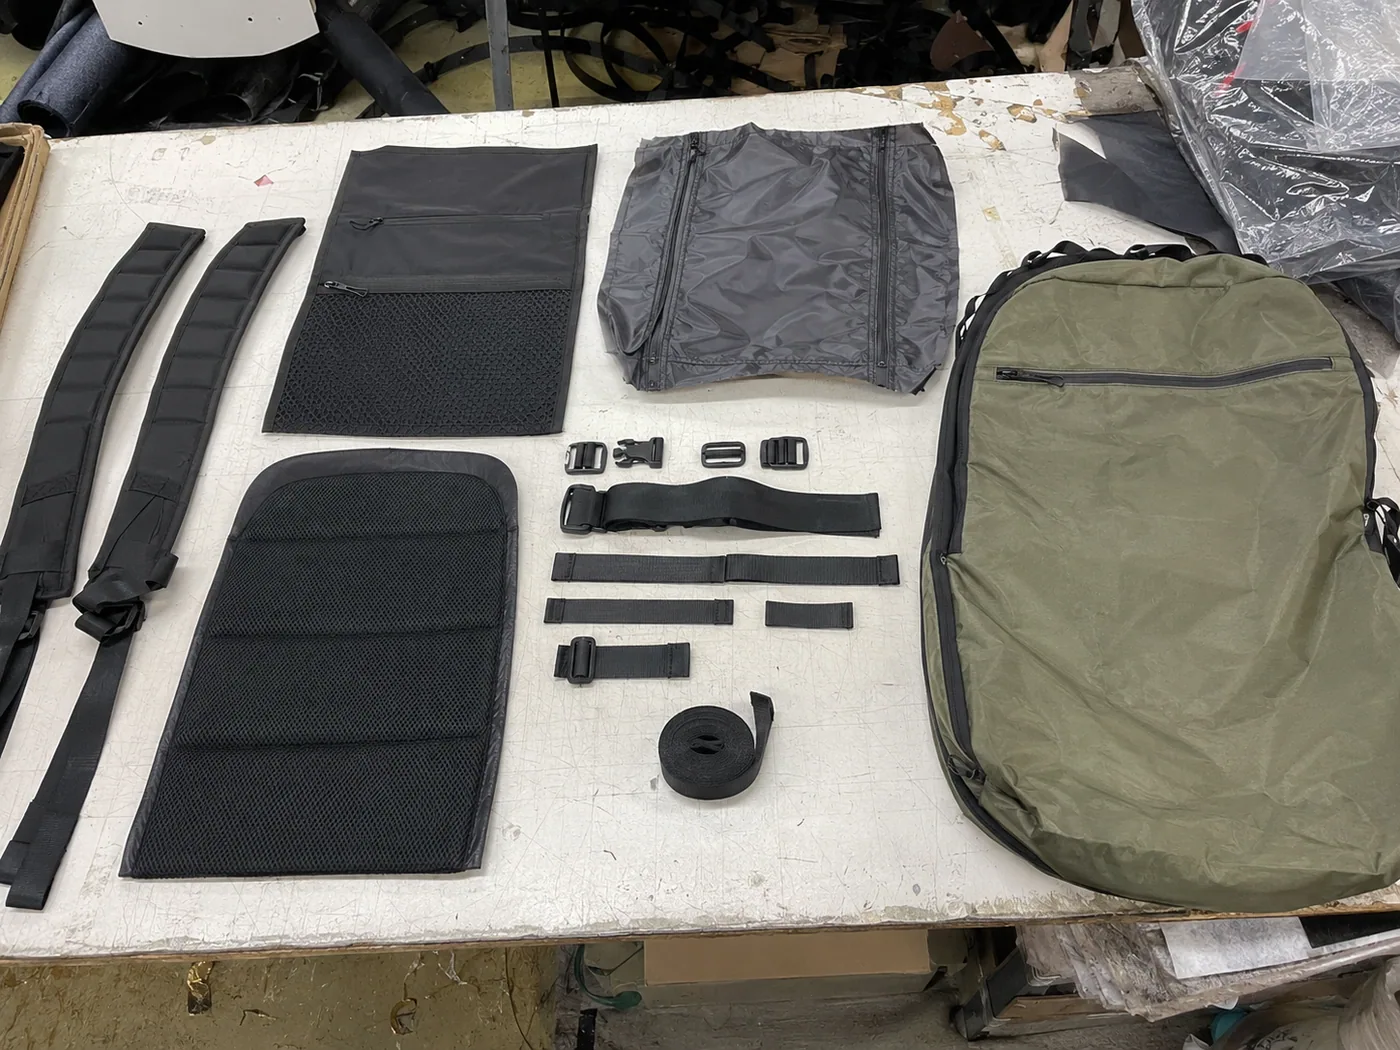
Component layout evidence
This image adds a real parts-table reference for straps, zipper panels, lining, foam, buckles, webbing, mesh pockets, and shell fabric.
Asset sections
Panels define the pattern, shape, capacity, material use, and visible branding areas.
Comfort parts need clear size, padding, reinforcement, and webbing choices.
Pocket and zipper decisions change labor, trim cost, and quality checks.
Reference table
| Item | Buyer check | Factory evidence |
|---|---|---|
| Front panel | Brand area, pocket layout, shape, and material | Artwork placement and panel pattern |
| Back panel | Comfort, airflow, laptop protection, and padding | Foam spec and sample construction review |
| Shoulder straps | Width, padding, webbing, adjuster, and reinforcement | Strap pull test and sewing review |
| Main zipper | Opening shape, zipper size, puller, and smoothness | Trim approval and function test |
| Laptop sleeve | Laptop inch size, padding, lining, and closure method | Compartment measurement and fit check |
| Bottom panel | Abrasion, standing shape, and stress-point reinforcement | Material and reinforcement review |
Original citation asset
If another site references this asset, the link should point to the full page so buyers see the context, checklist, and RFQ route.
Download backpack diagram
Copy checklist
Embed this backpack parts diagram
If another site references this asset, the link should point to the full page so buyers see the context, checklist, and RFQ route.
<a href="https://connectbags.com/backpack-parts-diagram/"><img src="https://connectbags.com/assets/link-assets/backpack-parts-diagram.svg" alt="Backpack parts diagram for OEM construction"></a><p>Source: Connect5 backpack parts diagram</p>
FAQ
It should show front panel, back panel, gusset, bottom, shoulder straps, handle, zipper, pockets, lining, laptop sleeve, webbing, buckles, and reinforcement areas.
It gives buyers and factories the same construction vocabulary, which reduces vague quotes and sampling mistakes.
Yes. Buyers can use it as a checklist, then add exact dimensions, materials, trims, logo placement, and pocket layout in the tech pack.
Leave your message here and the factory team can follow up from the lead queue. You can also use the email fallback anytime.